119
119
This Knowledge Base article will demonstrate the steps necessary to map & connect to your work drives while on a Mac.
**This process ONLY applies to Mac users, and the steps that follow are to be performed while on the TSC network**
**Should you need to map drives to your Mac while off-site, visit the following link & connect to the VPN, substituting that process for Step 1 of this article**
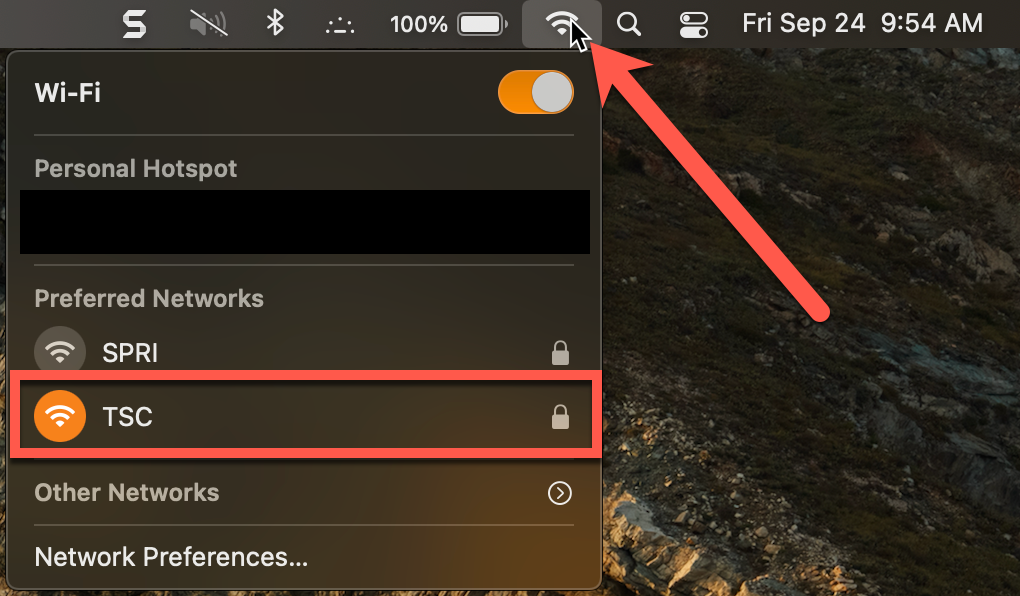
Step 1. Ensure you are on the TSC network by checking your Wi-Fi settings; if asked to connect, use your work PC username and password (first initial-last name, and PW that unlocks your PC)
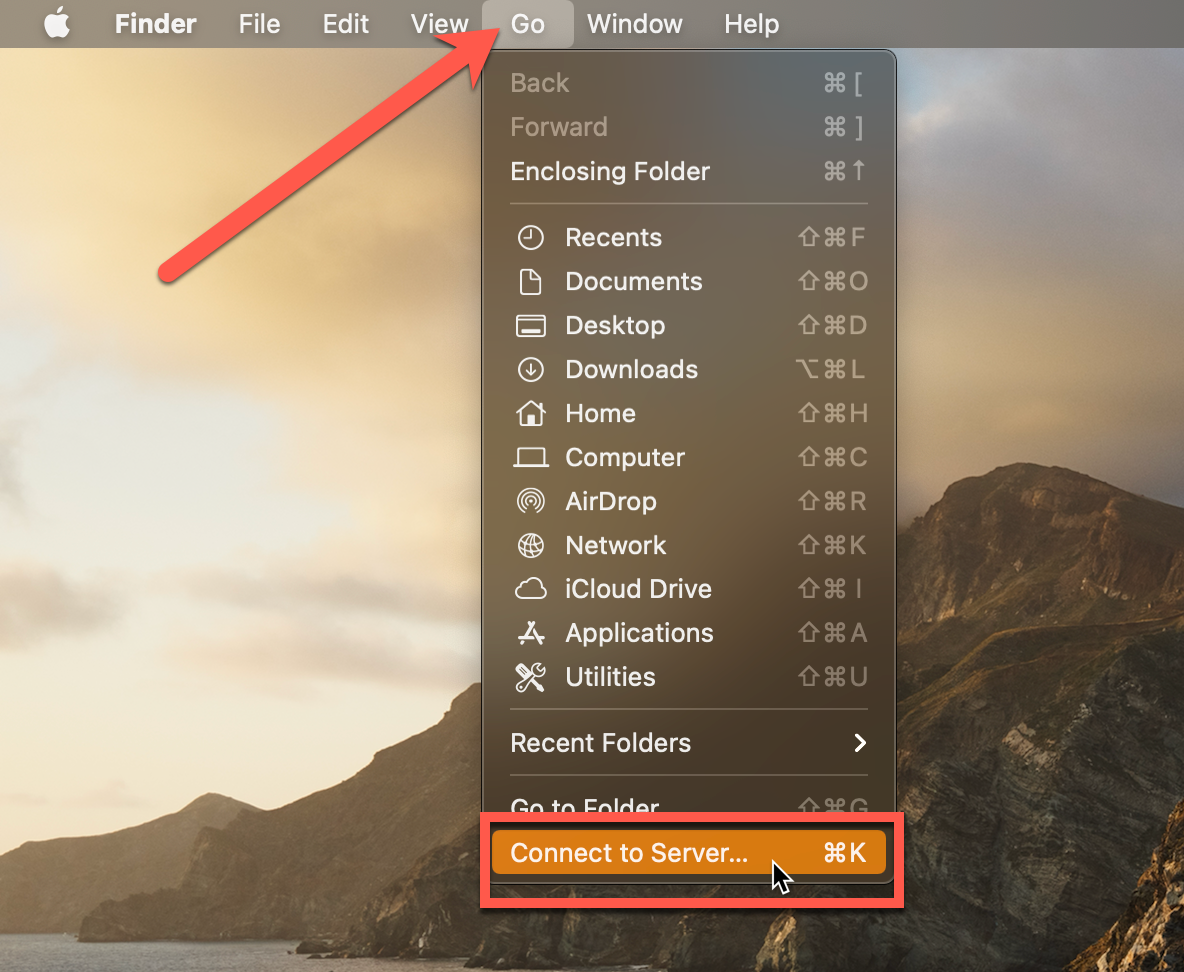
Step 2. Once connected to the TSC network, simply click on the desktop to bring up the Finder interface along the top bar; then, click Go, followed by Connect to Server.
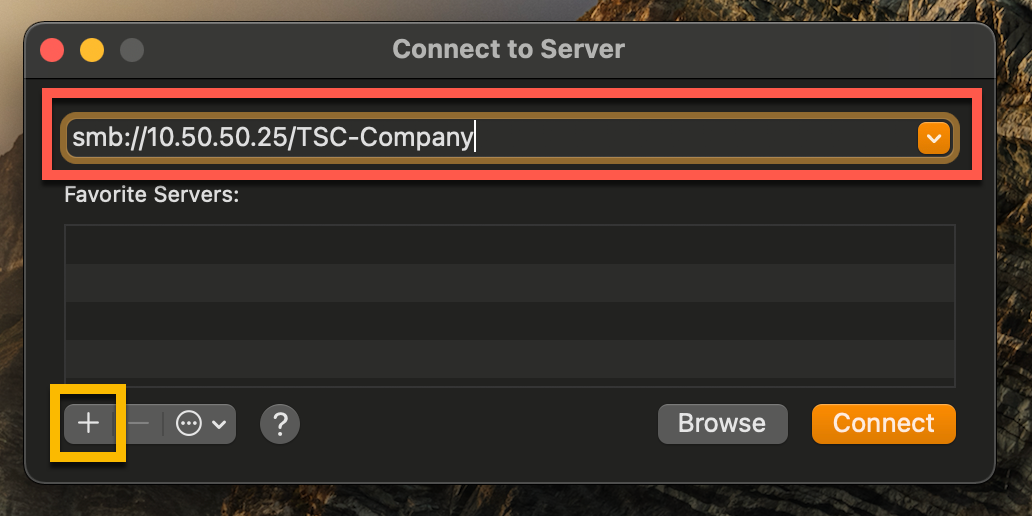
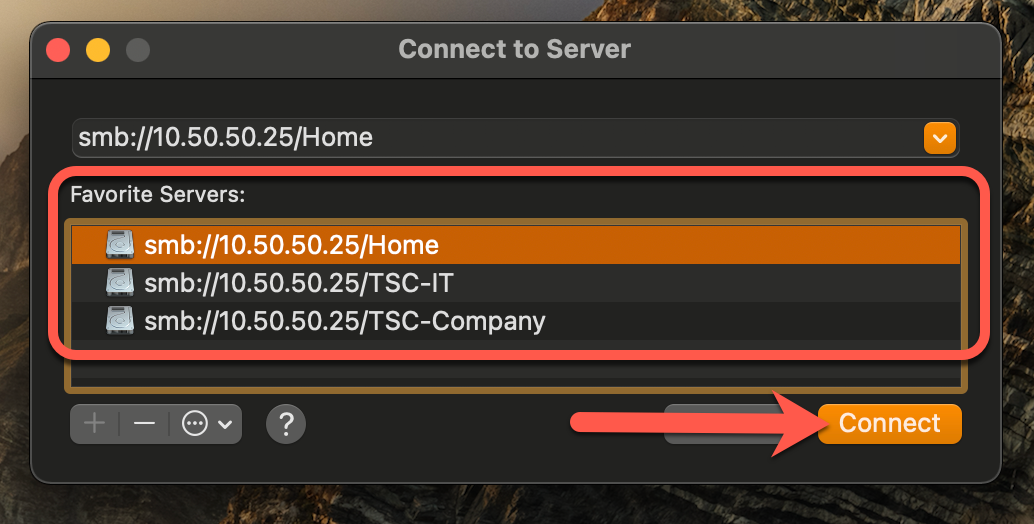
Step 3. In the RED BOX, drive paths can be manually entered, while the + sign, found in the YELLOW BOX, can be used to store frequently used drives for easier connection at a later time; IT will configure this for you, so you won't have to enter the drive names/paths.
Step 4. From the list of Favorite Servers, as highlighted by the RED BOX, select a drive you wish to connect to, then click Connect.
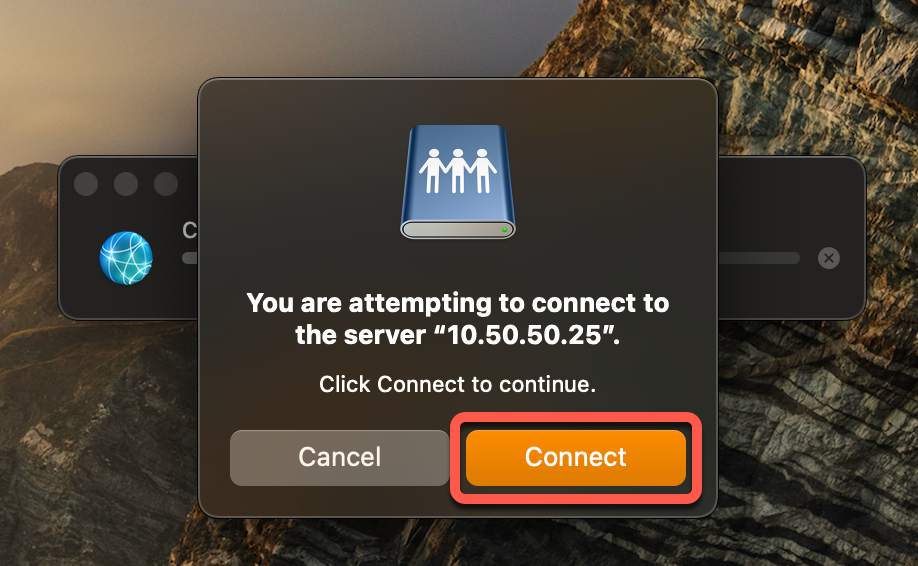
Step 5. Upon hitting Connect, you will be shown the following message; simply hit Connect once more.
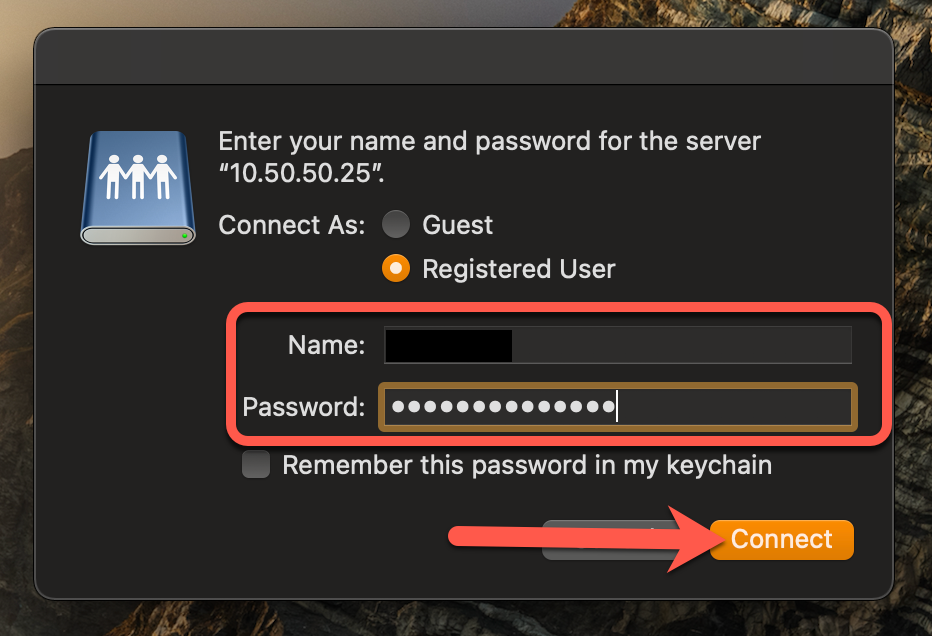
Step 6. When prompted, enter your TSC username (first initial-last name) in the Name field, and your PC password in the Password field, then click Connect.
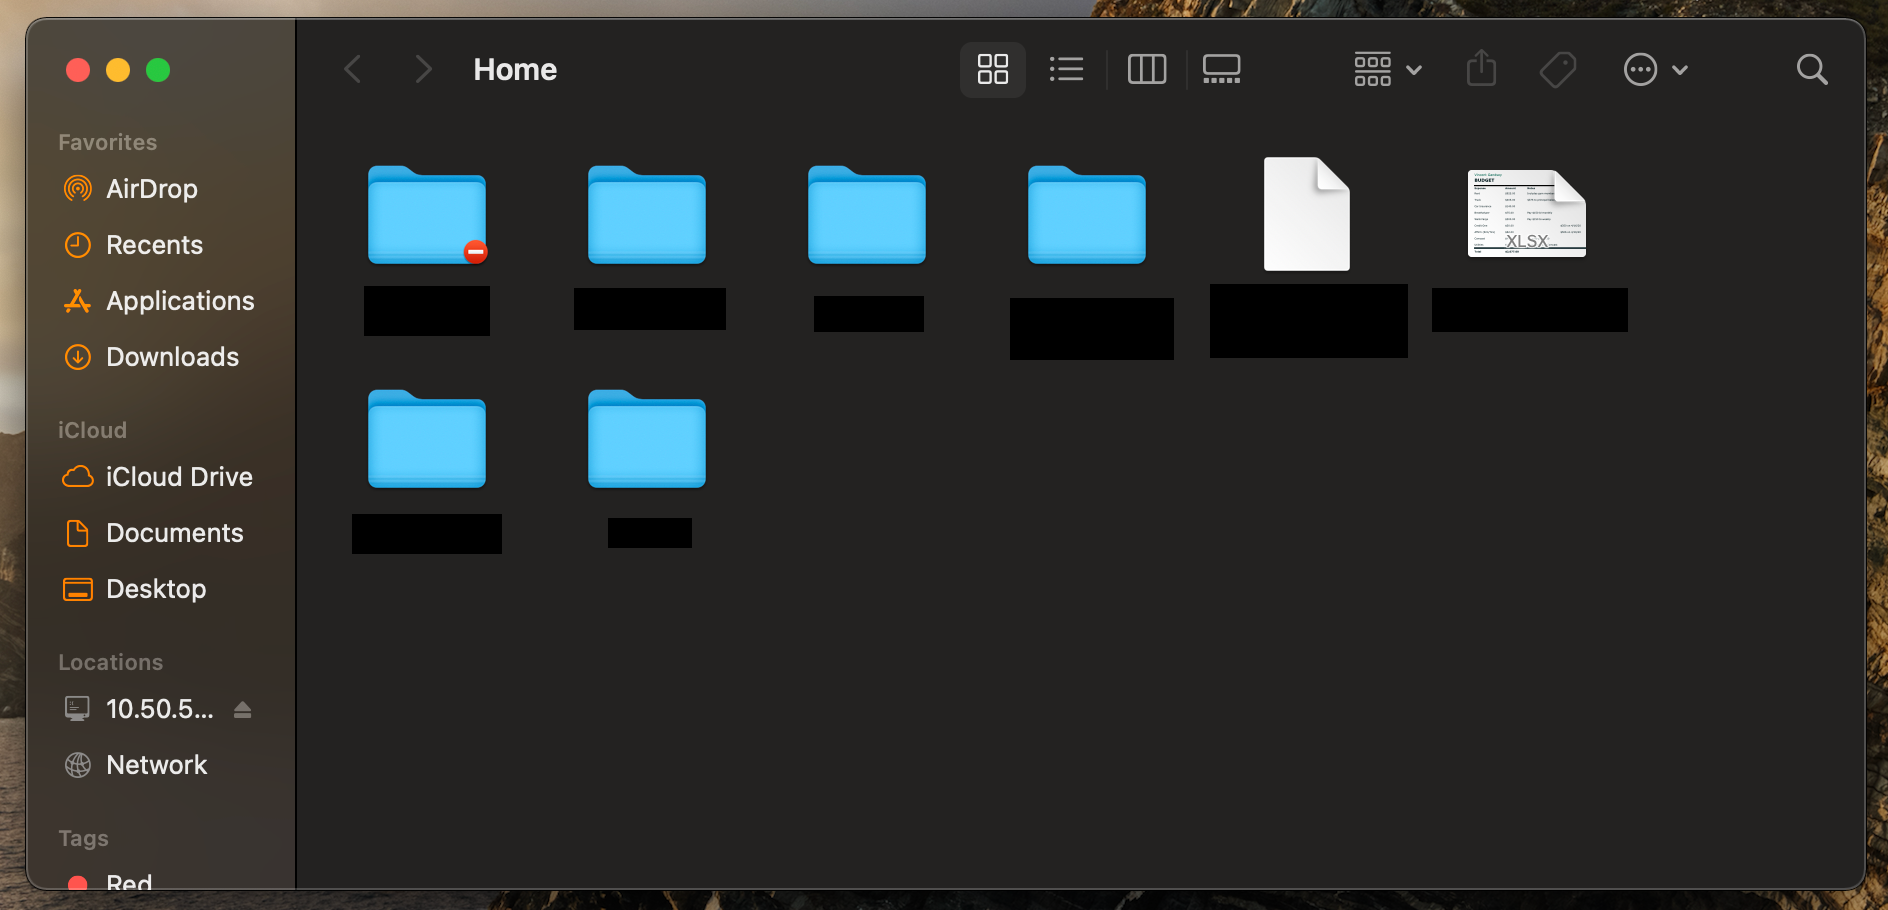
Step 7. The following is a preview of a drive, just to give you an idea of what you should see once you've mapped a specific drive (in this case, a personal drive with contents redacted)