
 150
150
This Knowledge Base article will demonstrate the steps necessary to change agent permissions (PBX to CS/CS to PBX) within the Five9 call center.
**Such modifications can only be carried out by a supervisor within Five9; if you are not a team supervisor, this article can be disregarded**
Step 1. Sign into Five9 with your credentials; if you are the team supervisor, your standard credentials are all you'll need.
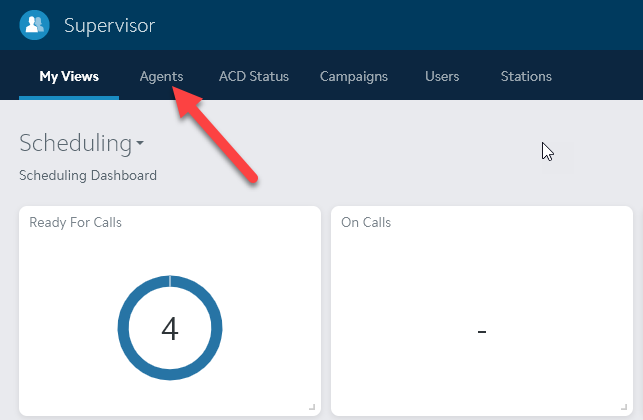
Step 2. Click Supervisor.
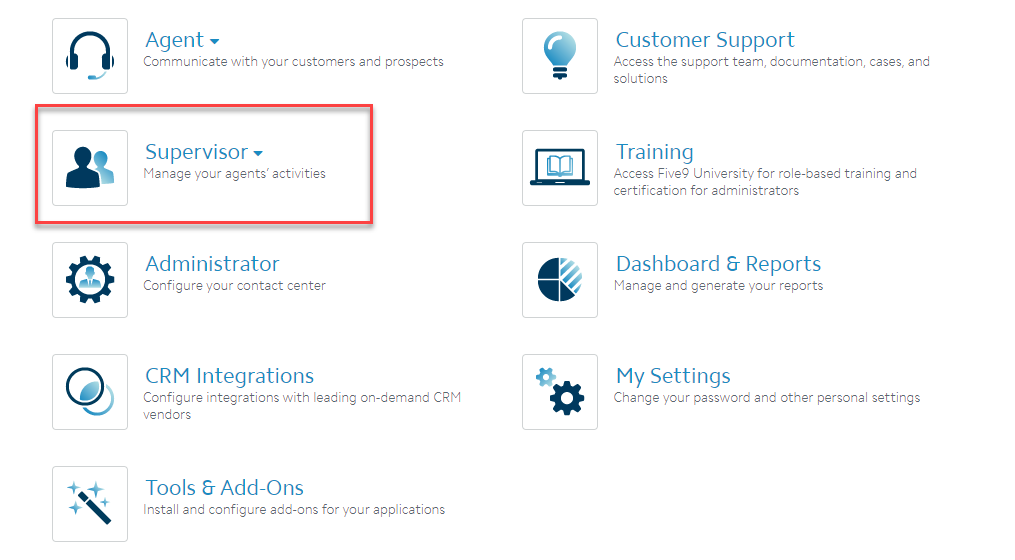
Step 3. Click Web; Desktop will not provide you the necessary options.

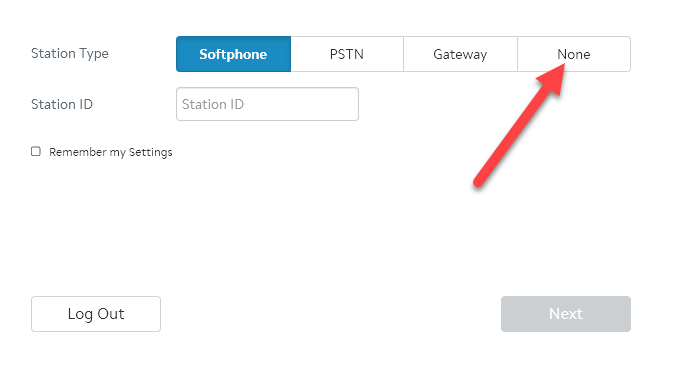
Step 4. In the resulting window, click None.
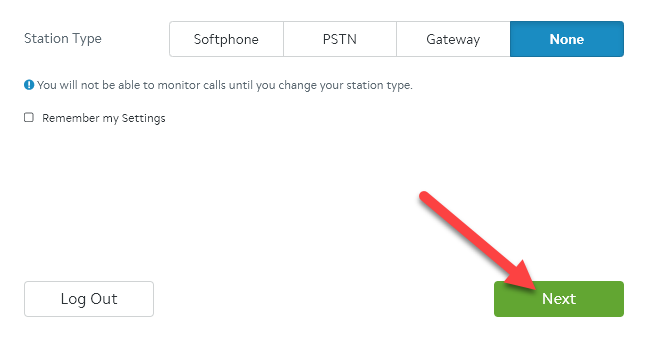
Step 5. Click Next.
Step 6. In the resulting window, click Agents.
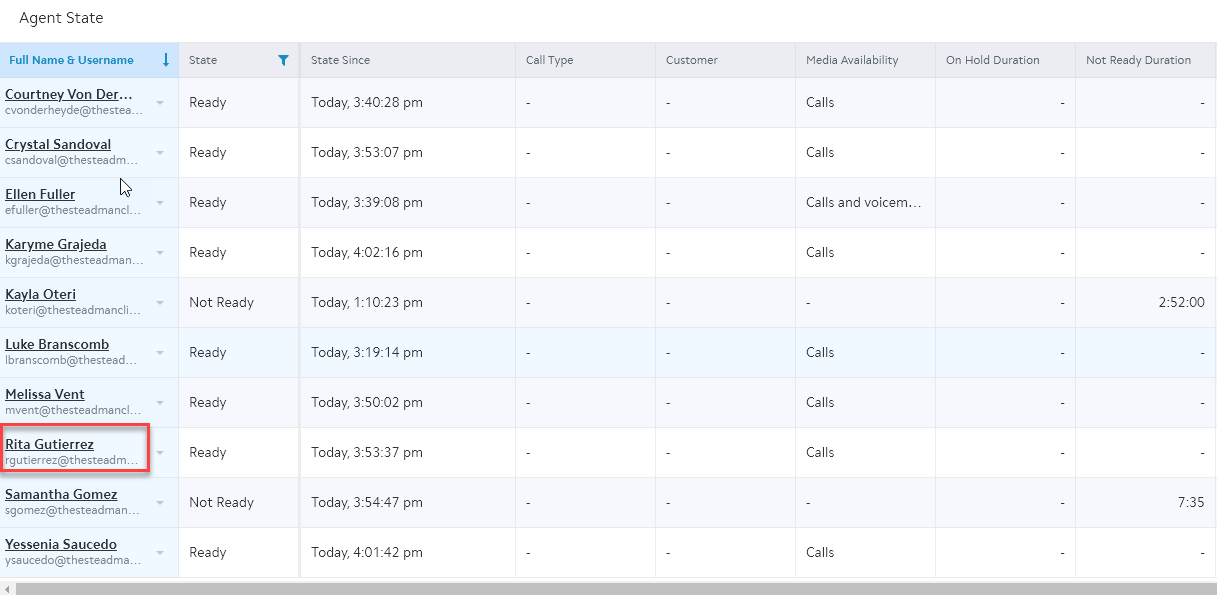
Step 7. Within the Agent State screen, select the agent that will be switching roles; the agent must be signed into Five9 to show in this window.
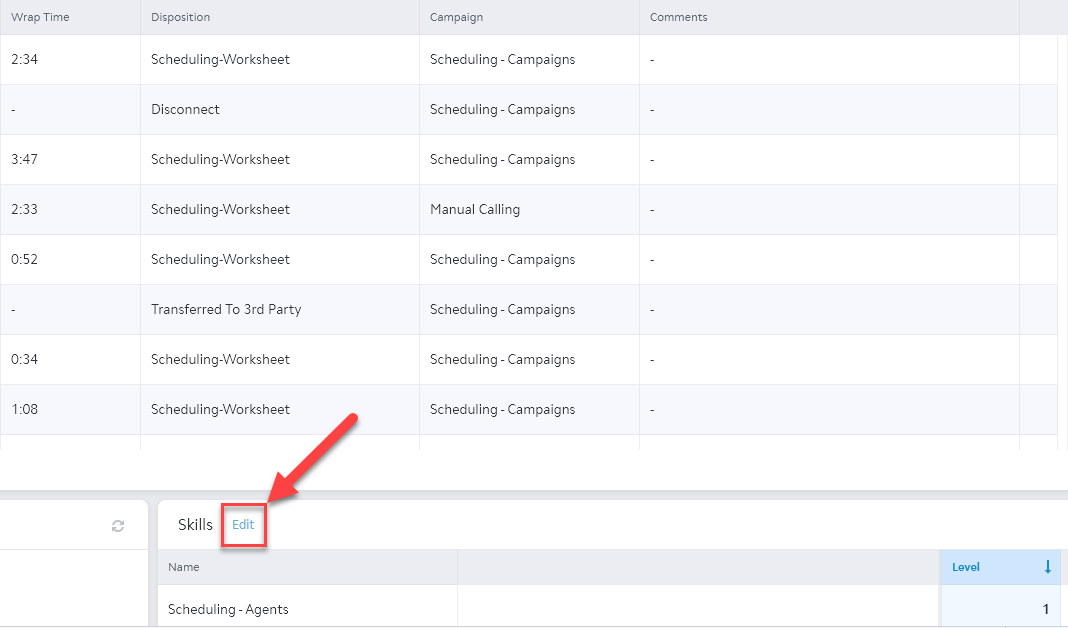
Step 8. In the bottom right of the resulting window, locate the Skills module and click Edit.
Step 9. Click the Add Skill dropdown menu.
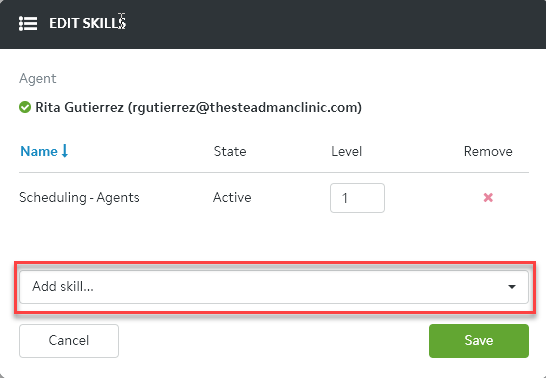
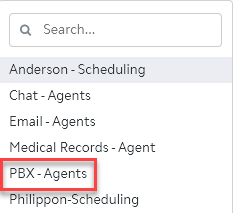
Step 10. Within the dropdown menu, select PBX-Agents or Scheduling-Agents, depending on which role they need to be moved into.
Step 11. Before hitting Save to apply the changes, use the red X to remove whichever role they will not be filling that day; for example, switching from PBX to CS means removing PBX once CS has been added, & vice versa.
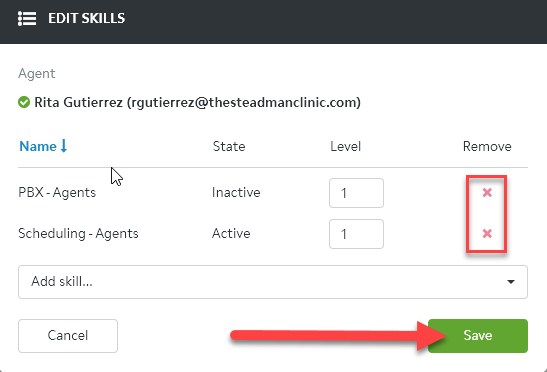
Step 12. Upon completion of Step 11, have the agent sign out and back into Five9 to apply the changes; this will need to be done every day that the agent switches roles, and only the supervisor can do so!

