
 69
69
This Knowledge Base article will demonstrate the steps necessary to connect to VPN as a SPRI employee; VPN is essential for anyone working off site who needs access to drives, and is only needed when not connected to our SPRI network.
**The process requires brief use of your primary work cellphone, so before proceeding, make sure to have the cellphone you use for work on hand**
**If any aspect of this process involves your personal cellphone, and you have a work cellphone, please let us know via a Helpdesk ticket so we can remove your personal cellphone from the equation**
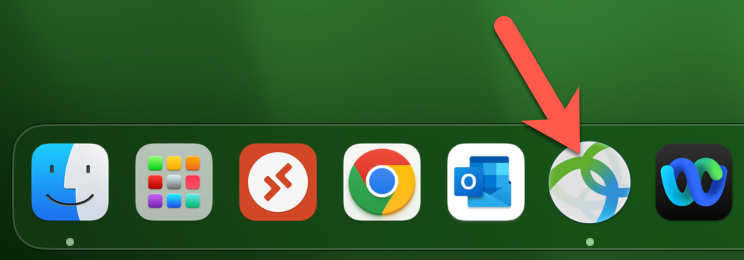
Step 1. Click the icon on the Dock, as indicated by the red arrow. If you don't see that icon, you can also search the application by its name "Cisco AnyConnect" and launch it that way.
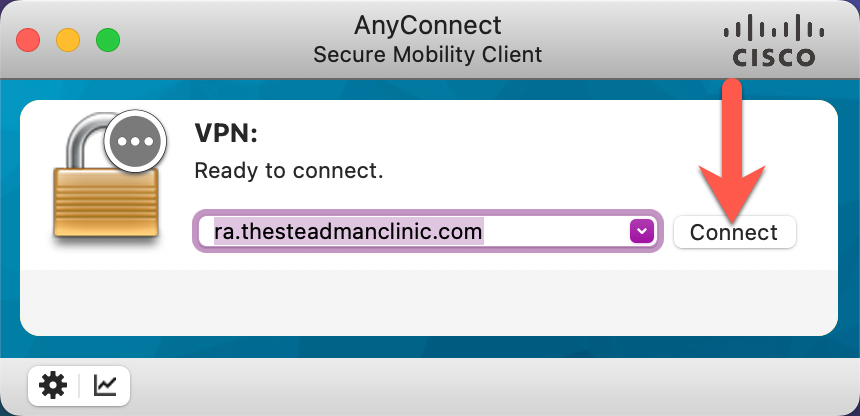
Step 2. In the resulting Cisco AnyConnect window, ensure the server address in the dropdown reads "ra.thesteadmanclinic.com" before clicking Connect; this should auto-populate.
Step 3. For SPRI employees, the Group dropdown must match the image below, displaying 2-SPRI-ANYCONNECT.

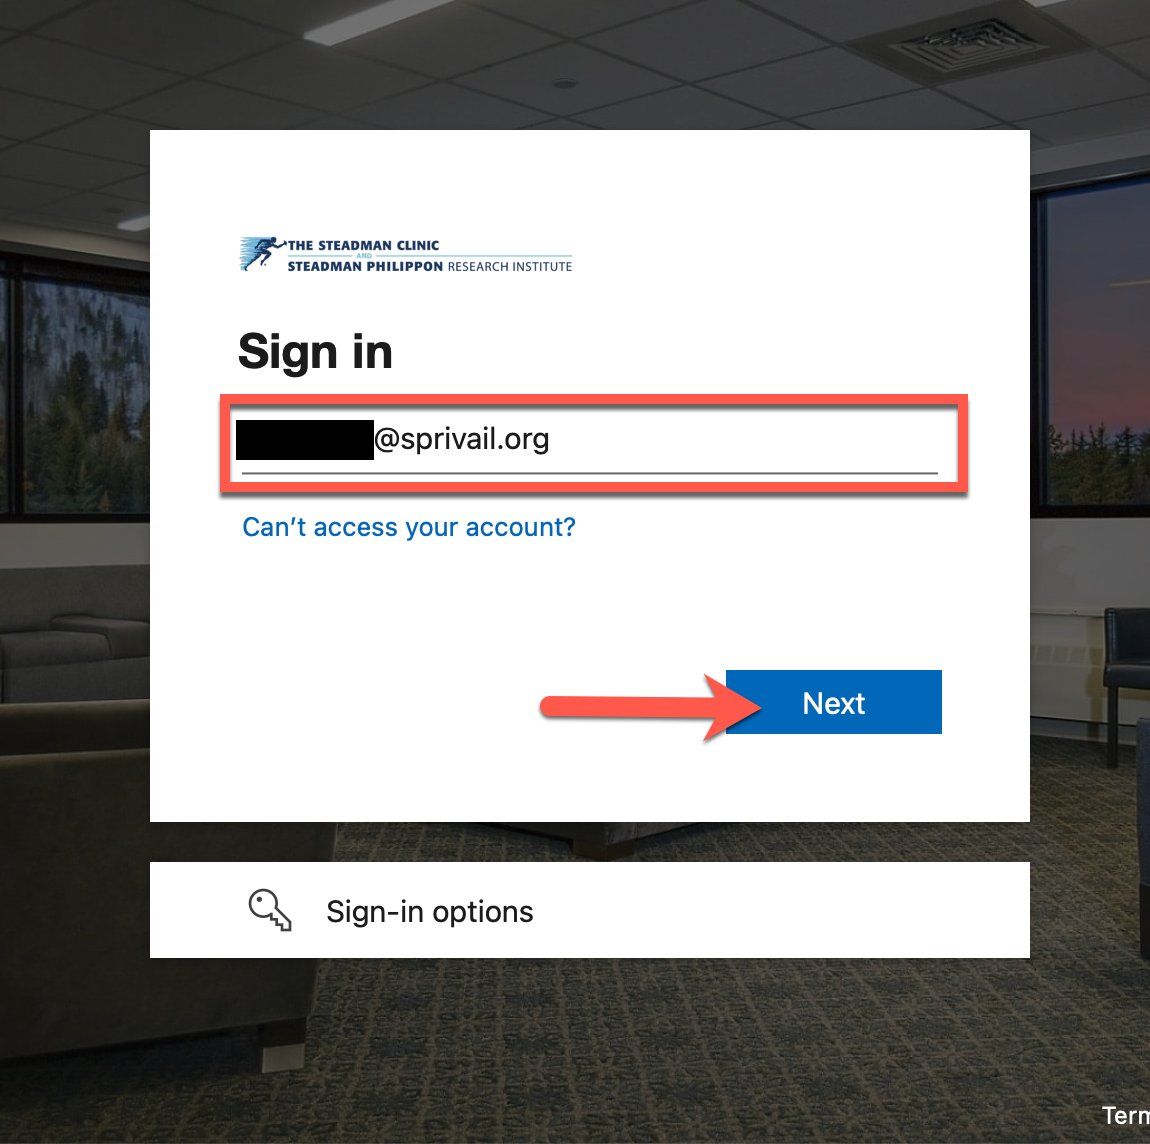
Step 4. In the companion window, please enter your work email address and click Next.
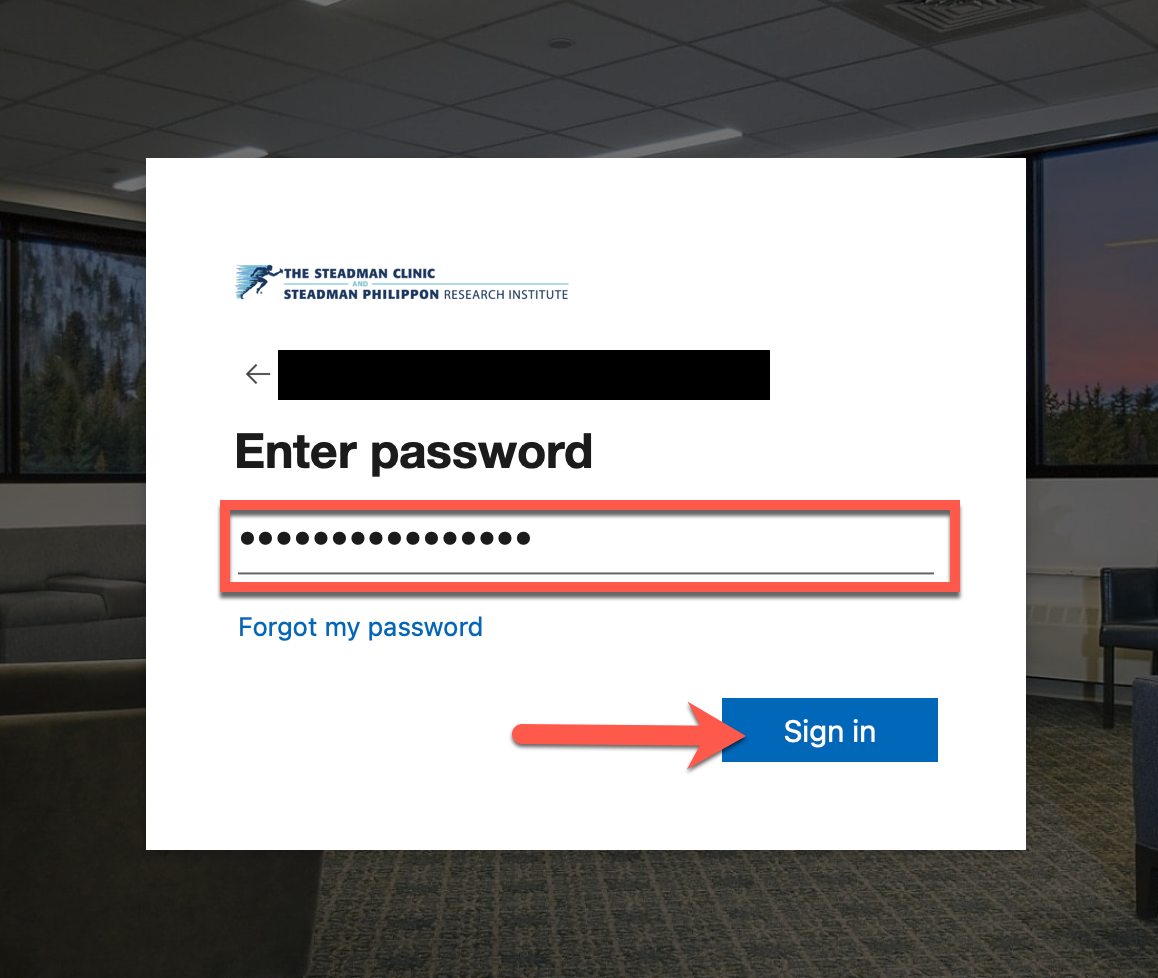
Step 5. In the following window, enter your AD password (the same password that unlocks your PC) and click Sign in; upon clicking Sign in, you will need your phone.
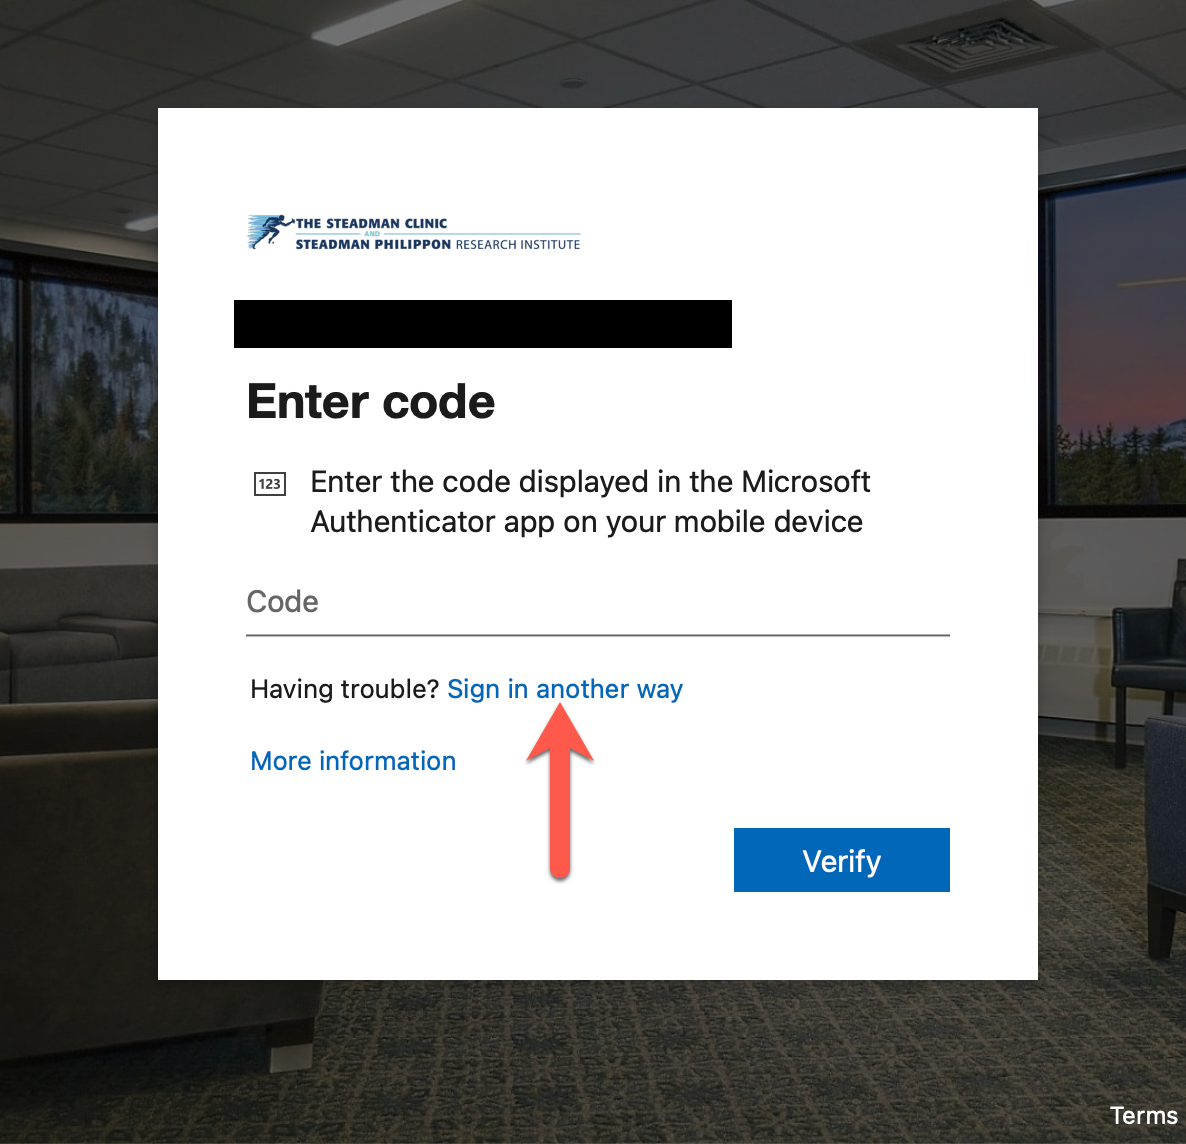
Step 6. If you see the below window asking for a code from Microsoft Authenticator, click the "Sign in another way" link to proceed.
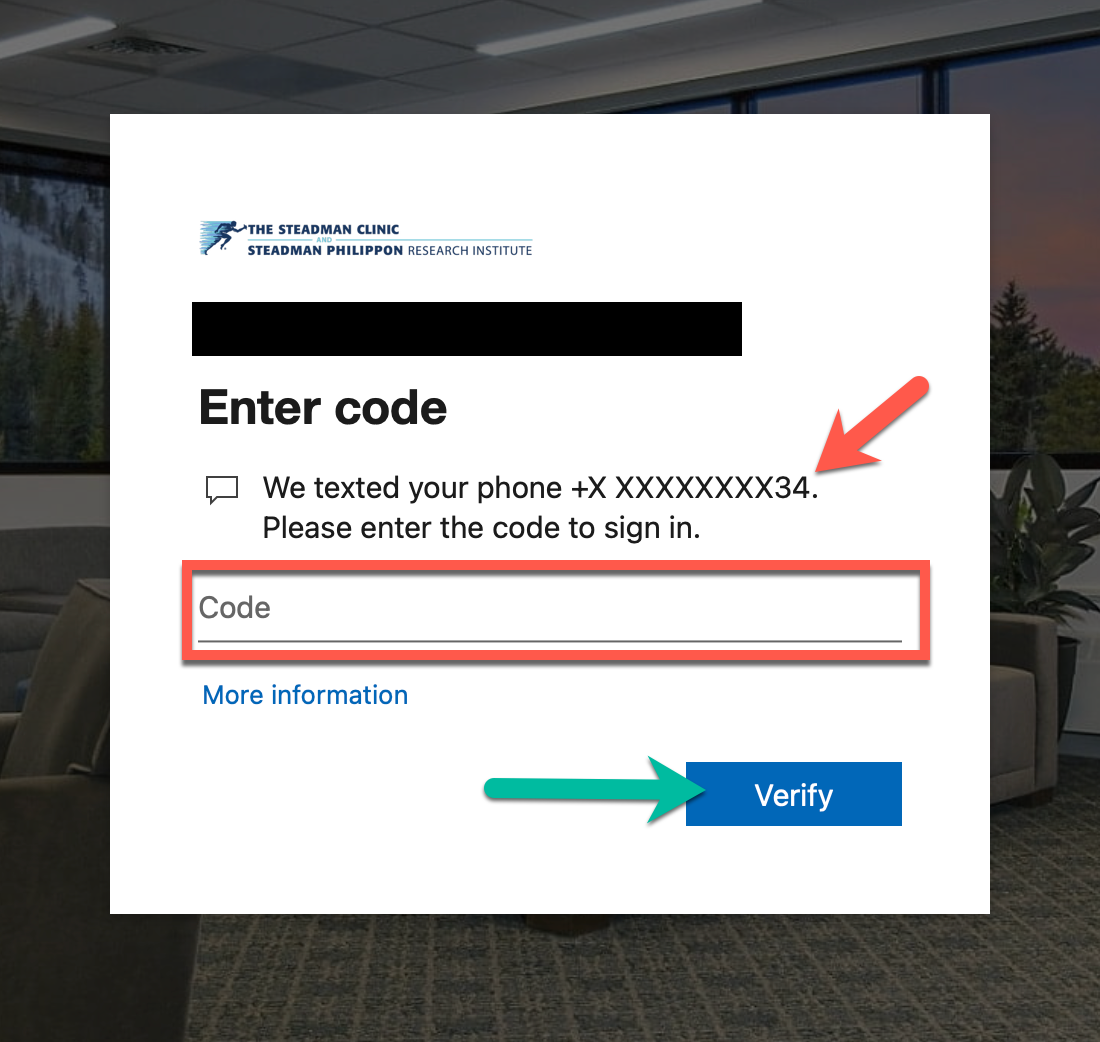
Step 7. In the subsequent window, click the "Text +X xxxxxxxxxx" link to receive a code via text.
**Note** If you have a work cellphone and the last 2 digits displayed are not that number, please let us know via Helpdesk ticket so we can get this corrected.

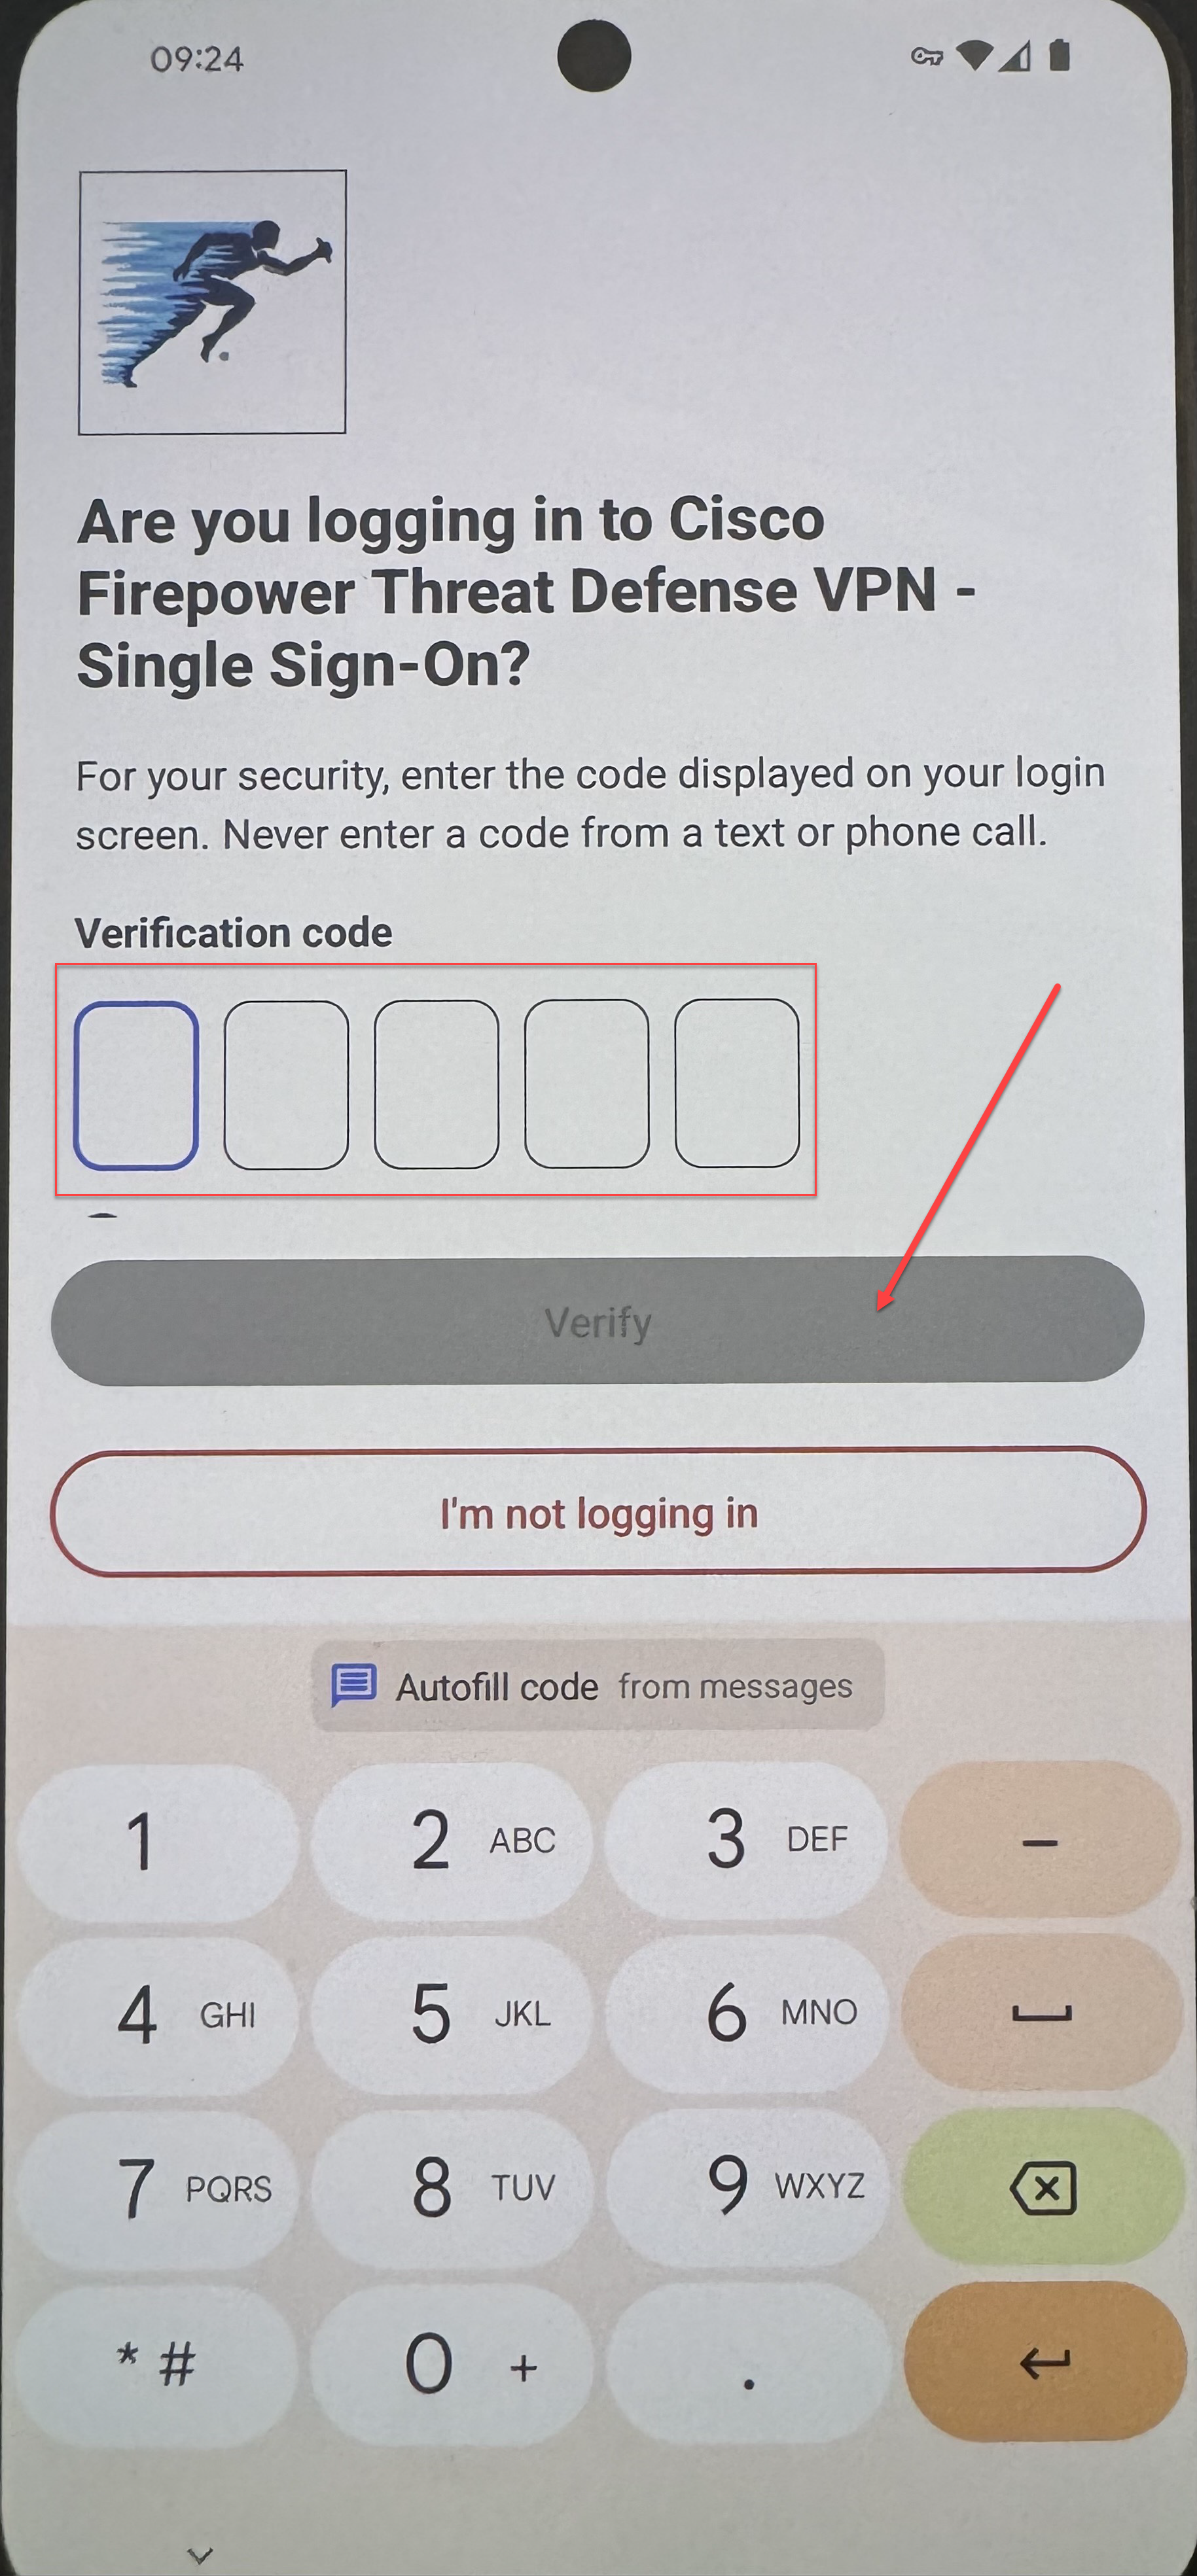
Step 8. Enter the code received via text into the field highlighted by the red box, and click Verify; again, if you have a work cellphone, and the last 2 digits of the phone number provided are not said work #, please let us know.
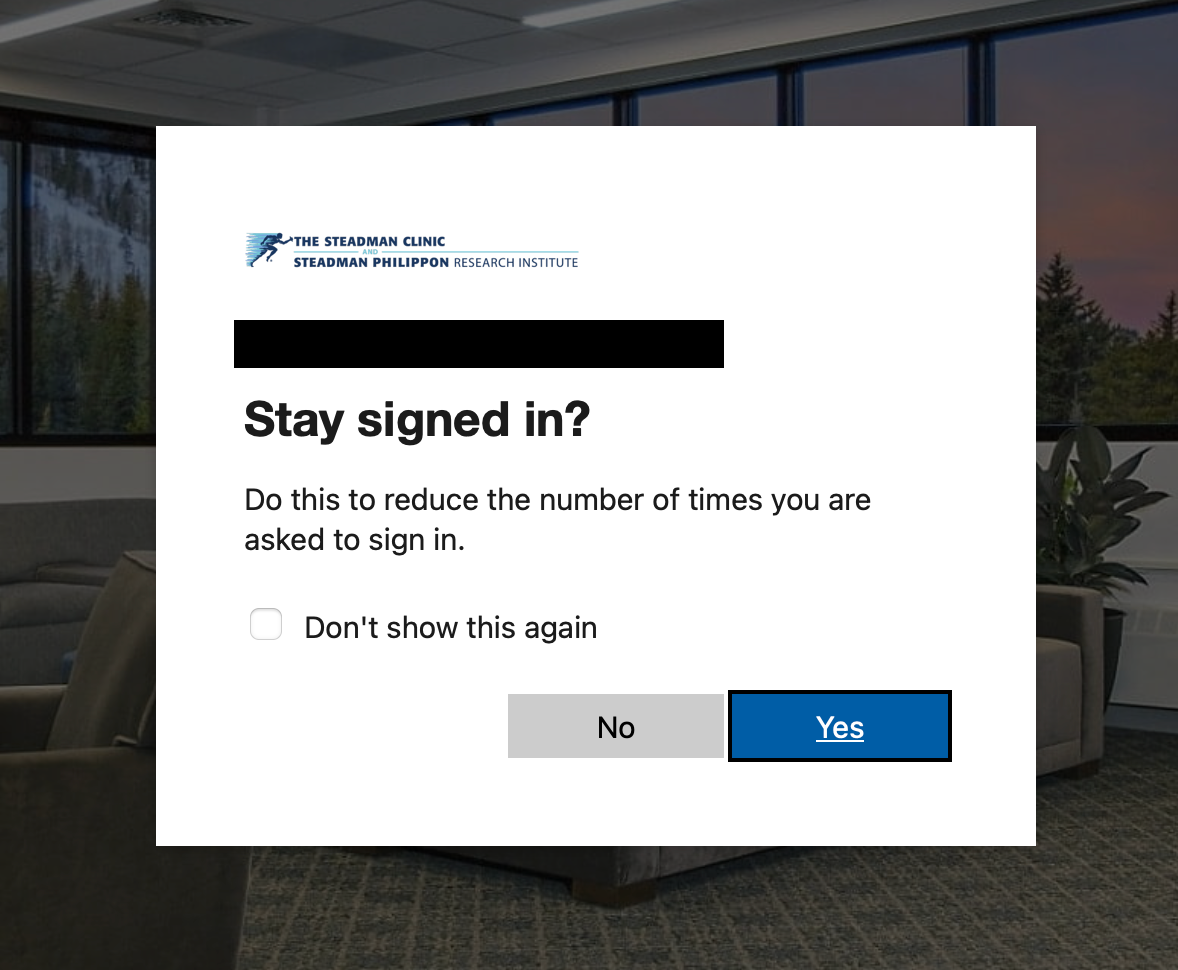
Step 9. Once you've entered the code, you will see the following window; you can choose either option, as this will be displayed upon every sign-in attempt.
Step 10. Upon completing step 9, you will be presented with a code that must be entered into Duo Mobile, as seen below. The phone number indicated by the red arrow denotes the line where the application is installed; if Duo Mobile is installed on your personal device, and you have a work cellphone, please let us know with a Helpdesk ticket.
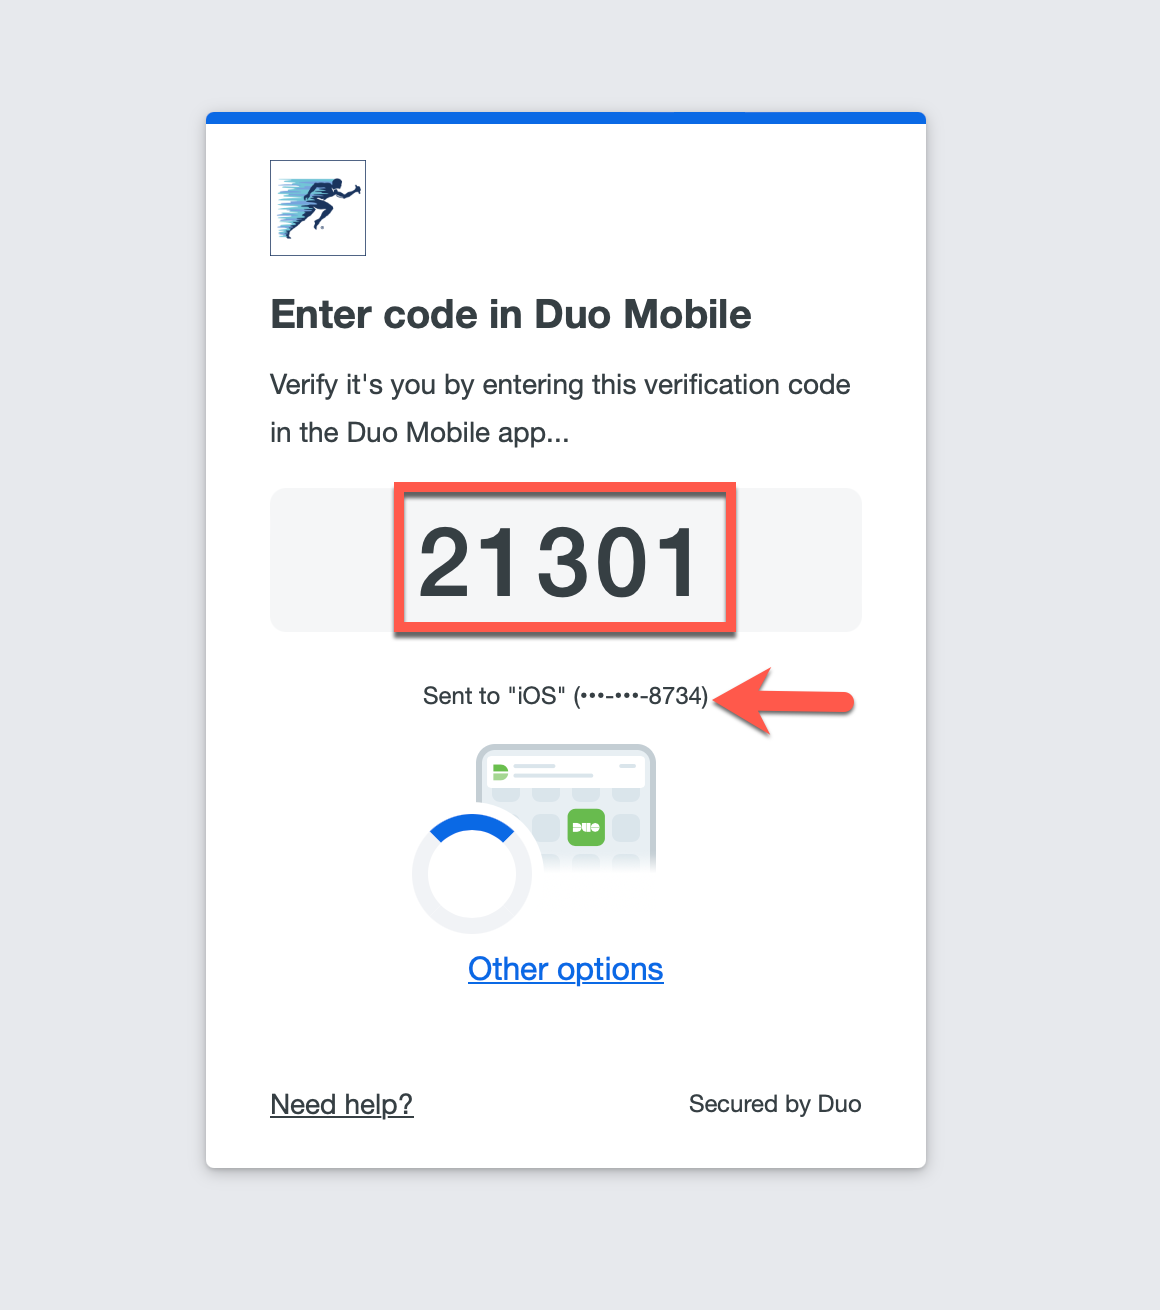
The above code is meant to be entered into the Duo Mobile app on your phone, as shown below.
Step 11. You are now connected to VPN, and will have drive access while working offsite.
*Note: As always, if you have any questions with this process, or if a specific step is not working for you, please let us know by creating a Helpdesk ticket (email [email protected]) and we will assist you.

